View and Change Identity Details
Viewing the details of an identity can help you see additional details such as Active Directory information, the applications an identity has access to, and the responsibilities they've been given within Permission Assist.
To view the details of an identity, select an account in the Identities list. The Identities / Details page is displayed.
Directory Info
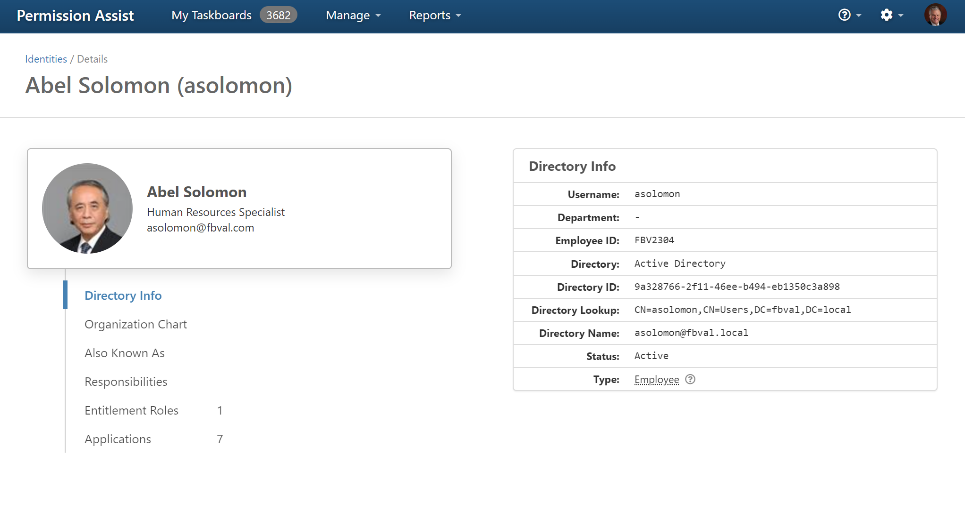
When opening the Identities / Details page the Directory Info is displayed by default, which provides more detailed directory source information about the account (see picture below).
Change an Identity Type
Within Permission Assist, identities can be classified as specific types such as employee, service account, vendor account, and so on. Identity types can be helpful for sorting/searching, and are also used by Permission Assist to create recommendations. The identity type is displayed within the Identity Details / Directory Info area on the right side of the page.
To change the type of an identity, complete the following steps:
-
On the Identity Details page, select Directory Info.
-
Select the Type link within the Directory Info area (displayed on the right side of the page). The Change Type window appears.
-
Select the drop-down field and then select a new type from the drop-down list.
-
Select the Change button.
Organization Chart
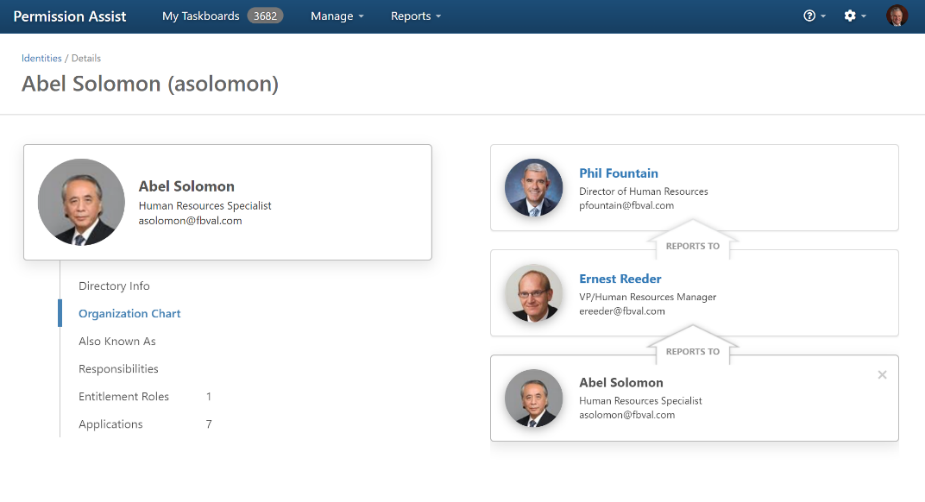
Selecting Organization Chart allows you to view the identity's supervisors and direct reports, if applicable (see picture below). To view the details of a supervisor or direct report, select their name.
Also Known As
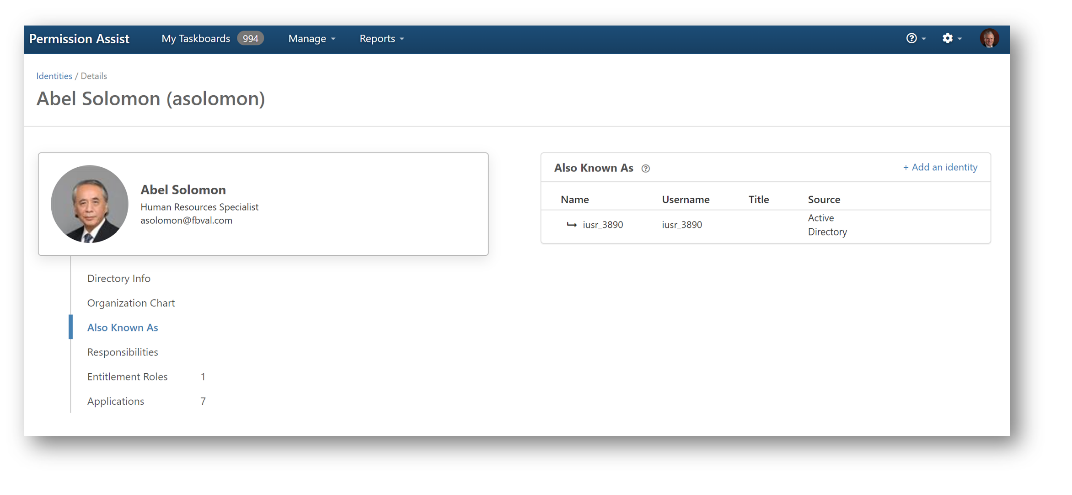
Selecting Also Known As allows you to view a list of employees that have been consolidated with this Identity. Sometimes, employees will have multiple Active Directory accounts to accommodate various situations; for example - their standard account, an admin account for one or more applications, an account for when they visit Branch A, and so on. In the past, Permission Assist considered each of these accounts as separate Identities. Now, you can have all of these accounts associated a single primary account - all considered a single Identity.
In the example shown below, Abel Solomon is a Human Resources Specialist. Abel has a standard Active Directory account, but he also has an additional admin account that is used to access sensitive permissions within specific applications. Using the "Also Known As" feature within the Identity Details page, you can associate the admin account with Abel (see picture below).
Consolidate Identities
To consolidate identities, complete the following steps:
-
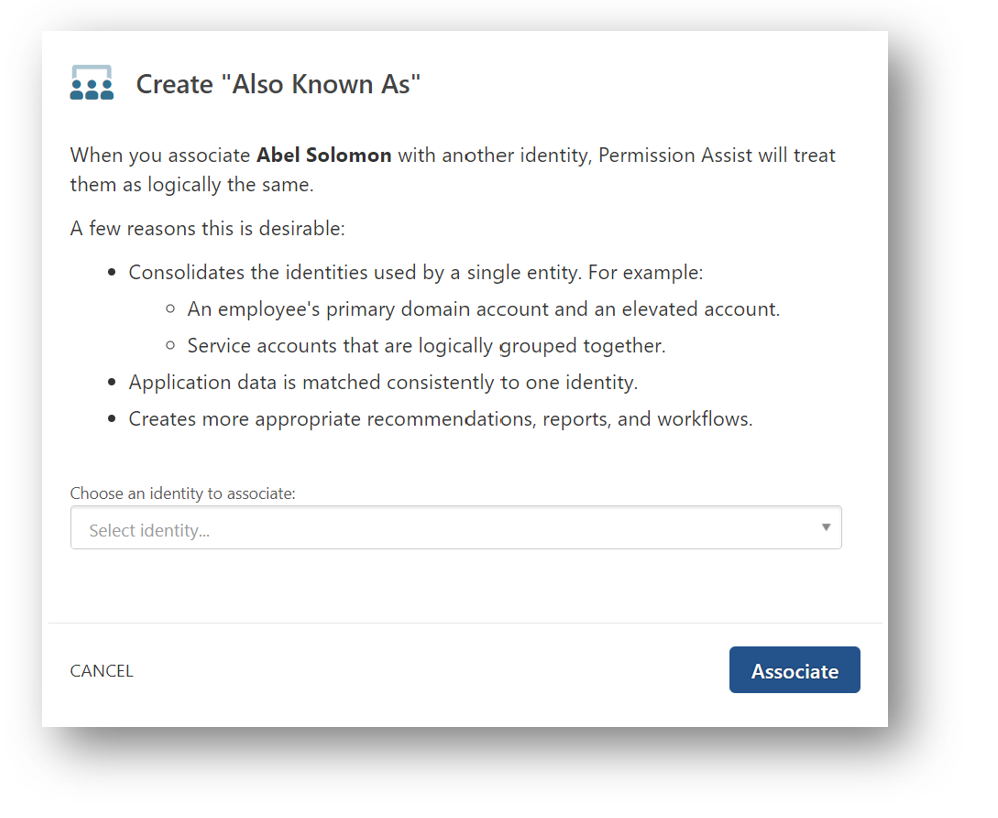
On the Identity Details page, the Also Known As option (if it's not already selected), and then select the + Add an Identity link in the upper right corner of the Also Known As area on the right. The Create "Also Known As" window appears (see picture below).
-
Select the Choose an identity to associate field and then select the Identity you want to add under this Identity.
-
Select the Associate button. The new Identity appears in the Also Known As list. Permission Assist now considers these a single Identity, which allows Permission Assist to match application users to Identities more consistently and also allows for more appropriate recommendations, reports, and workflows.
Detach Identities (from the primary identity):
-
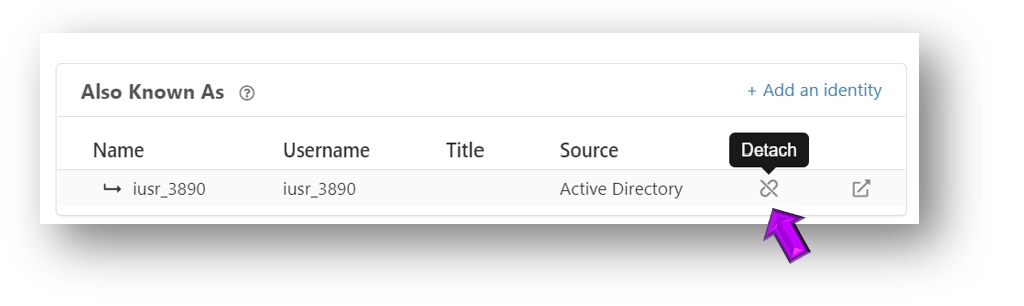
While viewing the Also Known As area for the primary identity, place your cursor over the identity you want to detach.
-
Select the detach icon (see picture below).
The Are You Sure? message appears.
-
Select the Detach button. The identity is removed from the Also Known As list and is now considered an independent primary Identity.
Detach Identities (from the associated Identity):
-
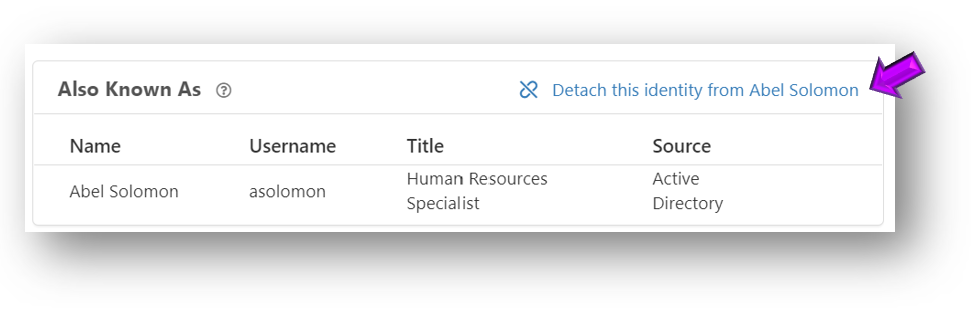
While viewing the Also Known As area for the associated Identity, select the Detach this identity from... link in the upper right corner (see picture below).
The Are You Sure? message appears.
-
Select the Detach button. The primary Identity is removed from the Also Known As list.
Responsibilities
View Responsibilities Associated with an Identity
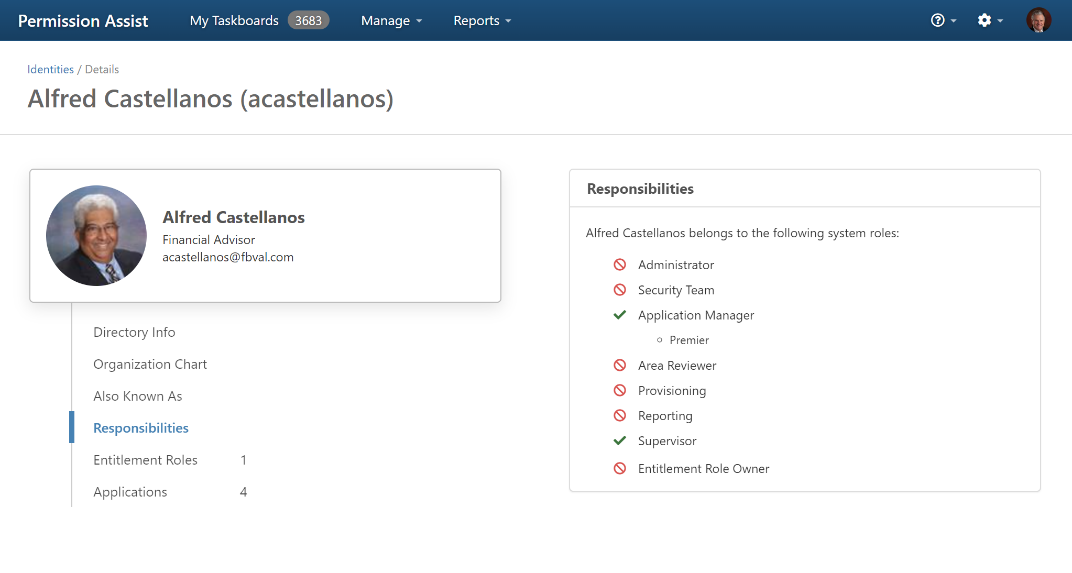
Selecting Responsibilities on the Identity Details page allows you to see which responsibilities the identity has within Permission Assist. A red circle with a line through means the identity does not have that responsibility. A green check mark means the identity does have that responsibility (see example below).
For additional information about the responsibilities for each role, refer to the table below.
|
Role |
Description |
||||
|---|---|---|---|---|---|
|
Administrator |
An identity is an administrator if the identity belongs to the Administrator group within the System Configuration > System Authentication area. |
||||
|
Security Team |
An identity is a Security Team member if the identity belongs to the Security Team group within the System Configuration > System Authentication area. |
||||
|
Application Manager |
An identity is an application manager if the identity is added to the Application Managers field within an application (Manage > Applications > select the application > Responsibilities tab). |
||||
|
Area Reviewer |
An identity is an area reviewer if the identity is the assigned reviewer for a Reviewable Area within an application (Manage > Applications > select the application > Reviewable Areas tab). |
||||
|
Provisioning |
An identity is a provision engineer in either of the following cases:
|
||||
|
Reporting |
Reporting means that an identity has access to all reports under the Reports menu in Permission Assist. An identity is given access to reports when the identity belongs to the Reporting Only group within the System Configuration > System Authentication area. |
||||
|
Supervisor |
An identity is a considered a supervisor if:
Set On Behalf Of Reviewers for SupervisorsIf you have supervisors who either don't typically review the permissions of their direct reports or who may be out of the office during a review, the 'On Behalf Of' feature allows you to either temporarily or permanently shift review responsibilities to another person. To assign a reviewer to act 'On Behalf Of' a supervisor, complete the following steps:
|
||||
|
Access Model Owner |
An identity is an access model owner if they are the assigned owner within the settings of an access model. |


Access Models
View Access Models Associated with an Identity
Selecting Access Models on the Identity Details page displays a list of access models in which the identity is enrolled (see picture below). To view more detailed information about one of the access models, select the access model within the list.
Applications
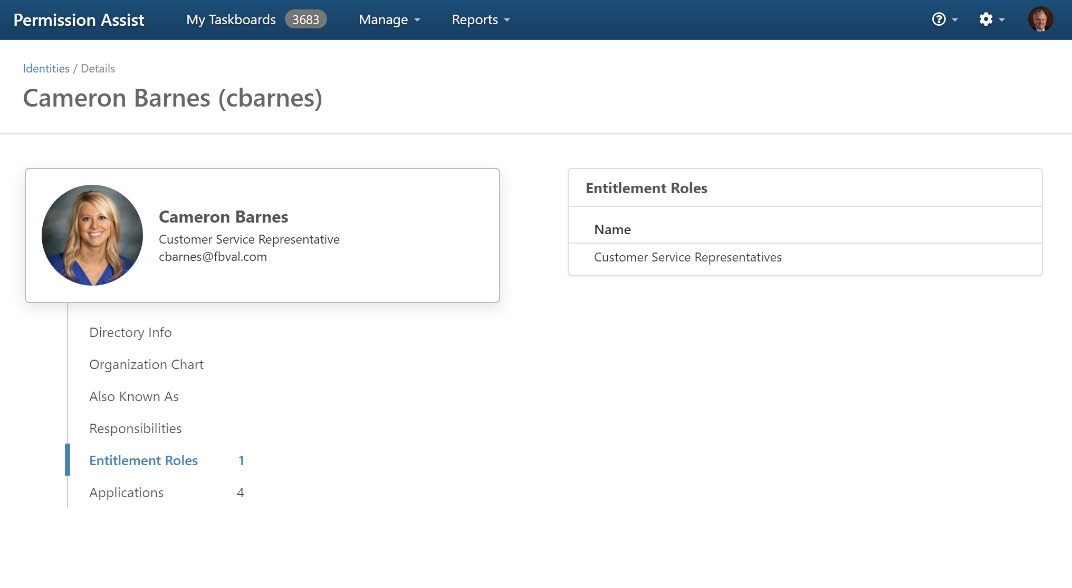
View Applications Associated with an Identity
A list of applications associated with the identity is displayed in the Applications list on the right side of the page. In order for the application to show up in this list, an application user must be matched to the identity within the application's Users tab.